Design Your Own Vinyl Lettering
Product ID: t661The design is set up as a Gang-Run which means the same text or design has been duplicated in a single product. Please remove the duplicate lines and increase the quantity accordingly or press the fix design button below.
For more information about Gang-Runs and why we do not allow them please visit our FAQ page.
Saving Design...
Please wait while we save your design. Do not close this window or navigate to a different page.
About The Vinyl Lettering Designer
Need to add your company name, contact information or other details on your work vehicles? Want to add your favorite catch phrase to your car? You can use custom vinyl letter stickers to do all that and more. There are many uses for our custom vinyl lettering decals. It can be used to accompany other decals or stickers or used by itself. You can enter in any text you’d like, customize the font, color and size as it is made to order and will stick on any smooth surface.
Make Your Own Vinyl Lettering
Our vinyl lettering is also quite popular among store, restaurant and bar owners as an inexpensive, easy to apply, yet professional, way to add pertinent information to their front entrance or windows. This may include company name, contact phone number, hours of operation or maybe a slogan or whatever information that you need. It is also commonly used for work vehicles to add in a phone number, website address or other details to your vehicles as a great way to advertise and increase brand awareness for your business.
All of our custom vinyl lettering decals are made of high quality material is available at a low, affordable cost. We also provide wholesale pricing so you can get the best rate possible while still getting a high quality product. Customize and order lettering stickers for cars online today!

Frequently Asked Questions
What fonts can I order vinyl lettering in?
We currently offer 51 different font choices for vinyl lettering. For an up to date list please visit our Font Choices Page.
Counting Picks On A Transfer Sticker
Transfer stickers need to have material manually picked out from enclosed spaces such as letters like "O" and "P". The cutting machine that makes the sticker cuts the material, but does not remove it. A Car Sticker employee will then take a special set of tweezers and remove the material by hand.
Can I get a digital proof of my sticker before it goes into production?
Yes. Please request a digital proof in the special instructions of the line item you would like the proof for. Our team will prepare your design for print, then send you a PDF file for approval before starting production.
What is transfer tape?
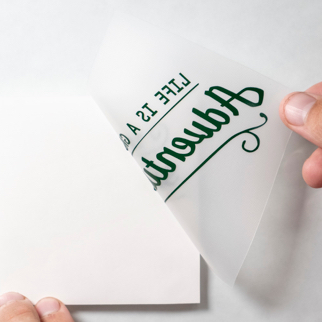
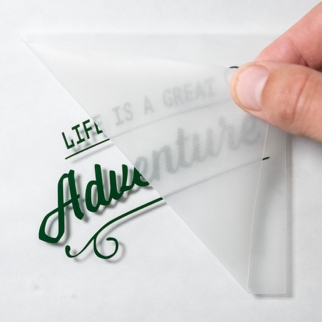
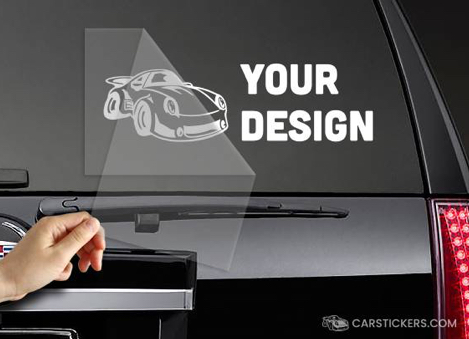
Transfer tape, also known as application tape, is a paper or plastic film that can be placed on the top of the sticker or piece of vinyl to make the sticker easier to apply. Transfer tape allows the installer to see exactly where they are placing the sticker on the substrate. Substrate is the term used for the material a sticker is being placed on, such as a window, car door, plastic sign, or anything else you like!
There are many different types of transfer tape, varying from paper, plastic, rolls and sheets. Here at Carstickers we make buying transfer stickers easy by using high quality clear plastic application tape. This works well with cut out stickers that have many different parts because it maintains the positions all of the letters and artwork of your sticker.


Clear tapes are transparent because they’re made from plastic face films instead of paper. The clear plastic construction provides the transparency that is needed for our customers easy placement stickers. With the car windshield, water bottle, laptop or any other substrate surface clearly visible, the installer can clearly see how the sticker will look when placed. Due to the non porous plastic material of the transfer tape, we recommend applying the stickers on a clean and dry surface.
To help you understand why transfer tape is so important to your sticker, here is our step by step process to producing transfer stickers:
STEP 1
After our customers choose one of our premium graphics, upload their own, or creates something new using our custom sticker maker, they select the color and size of the transfer sticker.
STEP 2
Our Graphic Design team then takes the design and prepares it for processing, ensuring that the design will look great for our customers.
STEP 3
Our talented processing team then takes a premium sheet of the selected vinyl color and runs it through a plotter. The plotter is a machine that cuts vinyl to a specified shape or design.
STEP 4
Once we’ve cut out the graphic, our team pulls the excess vinyl away from sticker (called topping) and carefully weeds the excess vinyl with a specialized tool.
Weeding spaces in between letters such as “A” and “O” are called picks.
Too many picks are very time consuming thus require an extra charge.
See our Counting Picks on a Transfer Stage page for more.
STEP 5
When the graphic is topped and weeded, we roll our high quality clear plastic transfer tape over the graphic.
The sticker is then cut to our customers specified dimensions.
Leaving the sticker in a sandwich between the vinyl backing and our transfer tape.
How do you remove vinyl lettering?
Vinyl lettering can be removed with your finger nails. If that is not doing the trick then you can use a blade.
{% standalone_video 'how-to-remove-vinyl-lettering-stickers' lazy=True %}How do I apply the stickers?
We have a comprehensive set of instructions on our Applications Instructions page and a set of these instructions will be mailed with each sticker order.
How long do stickers last?
The life of a sticker depends on the type of sticker material and where its placed. Stickers made out of vinyl and adhesive have a lifespan of up to 5 years while stickers made from cling last up to 6 months. Some specialty materials such as glow in the dark vinyl is not intended for long term outdoor use however it will still last indoors for up to 5 years. Perforated film that creates one-way visibility with its perforated vinyl pattern will last up to 3 years.
For more detailed information on the types of materials we offer check out our stickers materials page.
What Is The Minimum Letter Size You Can Cut As A Transfer Sticker
Best Practices For Uploading A Graphic
Uploading an existing image or design to create a custom sticker is easy! However, there are some common issues with uploaded files that can hold up the production process. Below are a list of best practices for uploaded files that can help you avoid delays in receiving your order.
Embed Images/FilesWhen you place an image or file into your illustrator document, make sure the file is embedded. With the placed file selected, you can see whether the image is Linked or Embedded in the top left corner of the document.
Outline FontsAfter you’ve designed your sticker in Illustrator or other design software, make sure that your fonts are outlined. When artwork is submitted without outlined text, we may not have the fonts needed to print your design as you created it.
White StickersIf you are ordering a sticker where the only color in the design is white, you can choose from a white transfer sticker or a clear vinyl sticker with the design printed in white. Transfer stickers have the design cut out of a piece of white vinyl and then have the background elements removed. Clear vinyl stickers have the design printed in an opaque, white ink and can either be die cut around the shape of your design or cut to a standard shape, such as a circle, square, or oval.
**In some cases, where a transfer sticker is too small to cut, we may recommend changing to a sticker printed on clear vinyl.
Cut Paths On Sticker SheetsWhile ordering a sticker sheet, cut paths are signified by a 1 pt. stroke around your artwork. The stroke must be a spot color with the name “CutContour." For detailed instructions on how to add cut paths to your artwork in Adobe Illustrator, please view this short tutorial video.
If you would like a sticker sheet, but don’t want to worry about setting up your own cut paths, simply select the “I need cut paths” option.
Submitting Transfer Sticker Artwork As A Black ImageWe often receive white artwork on a black background from customers who want to purchase a white transfer sticker. Please submit your artwork as a black image on a white background. Once you upload your file you will be able to select the color of your sticker.
Transfer Sticker File Types| Preferred Files | Not Preferred Files | Do Not Submit |
|---|---|---|
| .EPS | .JPG | MS Office Files |
| .AI | .JPEG | |
| .PSD | ||
| .TIF | .PNG | |
| .CDR |
You can check your file type by looking at the extension at the end of your file name. Example: transfer_sticker_file.eps
Printed Sticker File Types| Preferred Files | Not Preferred Files | Do Not Submit |
|---|---|---|
| .EPS | .TIF | MS Office Files |
| .AI | .CDR | |
| .JPG | ||
| .JPEG | ||
| .PNG | ||
| .PSD |
What is vinyl lettering used for?
Vinyl lettering can be used for a wide range of applications. Here are some popular uses:
Will vinyl lettering stick to wood?
Typically the answer is no, but in some cases it can work. Vinyl lettering adheres best to completely smooth surfaces like glass. If the wood is sanded and coated then it is possible to adhere vinyl lettering. But typically it is a challenge to get vinyl lettering to adhere to a rough surface with grain to it like wood.
Are glitter stickers laminated?
No, custom glitter stickers are not laminated.
Raster art vs. Vector art
One way designers get around being stuck with one size is to design in vector art programs (typically Adobe Illustrator and Corel Draw). Vector art programs use paths and shapes instead of pixels (Raster images) to determine shape and color. These shapes and paths can be enlarged and are not dependent to a pixel size, so their quality remains intact when sized. Typically people use vector programs to create logos and text, but are popular amongst designers because of their friendliness towards scalability. Visit our vectorization to find out about getting YOUR artwork vectorized.
Can I get my full color design printed on glitter stickers?
Yes you can get your full color design printed on custom glitter stickers.
How Thick Are Your Stickers?
Our stickers come in a variety of thicknesses based on material type and lamination options. Please see the table below to find the thickness of the sticker material you are looking for. We have included the thickness of the sticker alone as well as when it is still secured to the backing.
Sticker Material Thickness
| Sticker Material | Thickness of Sticker | Thickness of Sticker with Backing |
|---|---|---|
| White Cling | 4.33 mil | 8.27 mil |
| Clear Vinyl | 4.33 mil | 8.27 mil |
| Front-Facing Cling | 4.33 mil | 8.27 mil |
| Reflective Vinyl | 11.8 mil | 17.7 mil |
| Permanent Adhesive | 4.33 mil | 8.66 mil |
| White Vinyl (Most Popular) | 4.33 mil | 8.27 mil |
| Glow in the Dark Vinyl | 13.0 mil | 18.9 mil |
| Front-Facing Adhesive | 4.33 mil | 8.27 mil |
| Perforated Film | 6.7 mil | 12.6 mil |
| Clear Cling | 4.33 mil | 8.27 mil |
Transfer Sticker Guidelines
Each line of text must be at least .25 inches tall. Transfer stickers should be measured by the overall width multiplied by the overall height. Learn more about measuring transfer stickers. Strokes, line weights and art elements should be at least .0625 inches thick. An additional charge may apply if your uploaded artwork has more than 20 picks. Learn more about counting picks. If you would like a proof before your sticker goes into production, you may ask us for one in the special instructions box. Click here to view application instructions for transfer stickers.
How Are Stickers Measured and Priced?
At Carstickers.com, we measure and price all our stickers based on square inches. The easiest way to figure out the square inches of a sticker is to multiply the width by the height. For example, a sticker that is 4”W x 4”H (4 inches wide and 4 inches high), and a sticker that is 2”W x 8”H (2 inches wide and 8 inches high), will cost the same because they are both 16 square inches.

These measurements are based on the widest and tallest areas of the sticker's shape when a straight line is measured from left to right and top to bottom.

Please note: The measurements are taken when the design is upright and in the same position as it will be applied. This ensures the sticker you order will fit in the space intended. In theory, a diamond-shaped sticker could be rotated 45 degrees and measured as a square, but a 3”x3” diamond and a 3”x3” square rotated 45 degrees are not the same size and will not fit in the same space.
What is a Transfer sticker?
A transfer sticker is created by cutting sticker material to a shape, graphic or text, and then removing the background. Transfer stickers are not printed on, but instead are cut from a colored sheet of vinyl. If you would like a sticker with multiple colors but no background you should order a Multi-Color Transfer Sticker.

All of our Transfer Stickers come with three elements. The first is the backing of the vinyl sheet. This is the paper layer that the vinyl is originally cut from. The second layer is the sticker itself, which is cut by our plotters to your exact design. Finally we add a top layer of transfer tape to allow you to place the sticker exactly where you want on your material.
Applying a Transfer Sticker
When you get your transfer sticker in the mail, just lift the sticker and peel the white paper backing off of the adhesive. Then while holding the clear transfer tape, line your transfer sticker with the material underneath and place on the surface. If you have any air bubbles in the sticker, gently rub from the middle to the edges until the sticker lies flat. For more see the Application Instructions Page or watch the video below:
Create Custom Vinyl Lettering For Your Boat, Vehicle, & More!
We create vinyl numbers that won't fade and last up to five years. Perfect for fleet vehicles and boat stickers. Or increase awareness by creating inviting window signage that shares office hours, business information, or the latest sale; windshield stickers are a great way to advertise your company. We offer over 50 different high-quality vinyl colors and the ability to customize fonts and sizes.
View Video Library


